User Management
Within the ‘User Management’ tab, you can manage users and their roles. When signing up, you will typically get a fixed set of roles by default, each with assigned permissions for viewing, editing, and creating. These can be modified based on preference.- List View of users on BCC: Displays basic user details like Name, Email, Role, Joining Date, and Last Seen.
- Editing Permissions: The Owner/Admin can edit user details such as Name, Email, and Role. Can also see all the communities that the user is a part of and remove from any.
- Managing Users: The admin can go into each user profile and edit it.
- Creating/Inviting New Users: The admin can create new users with assigned roles or invite them.
User Roles
Brands can manage permissions assigned to roles from the ‘User Roles’ tab and can create new roles with custom sets of permissions.- Default Roles include: Owner, Admin, Brand Moderator, Finance Manager, Marketing Manager, Growth Manager, View.
- Admin/Owner can create new custom roles and assign custom permissions to those roles. Ie. Brand Moderator can have view/edit/create permissions to the moderator module under BCC.
Brand Settings
Brand Elements
Brands can manage assets such as uploading & updating their favicon, logo, and other color and font customizations that tie into their brand image.Whitelabel
White label integration can be done on onboarding flow as well as from settings module via Brand Control Centre. This is how your final whitelabel will look like :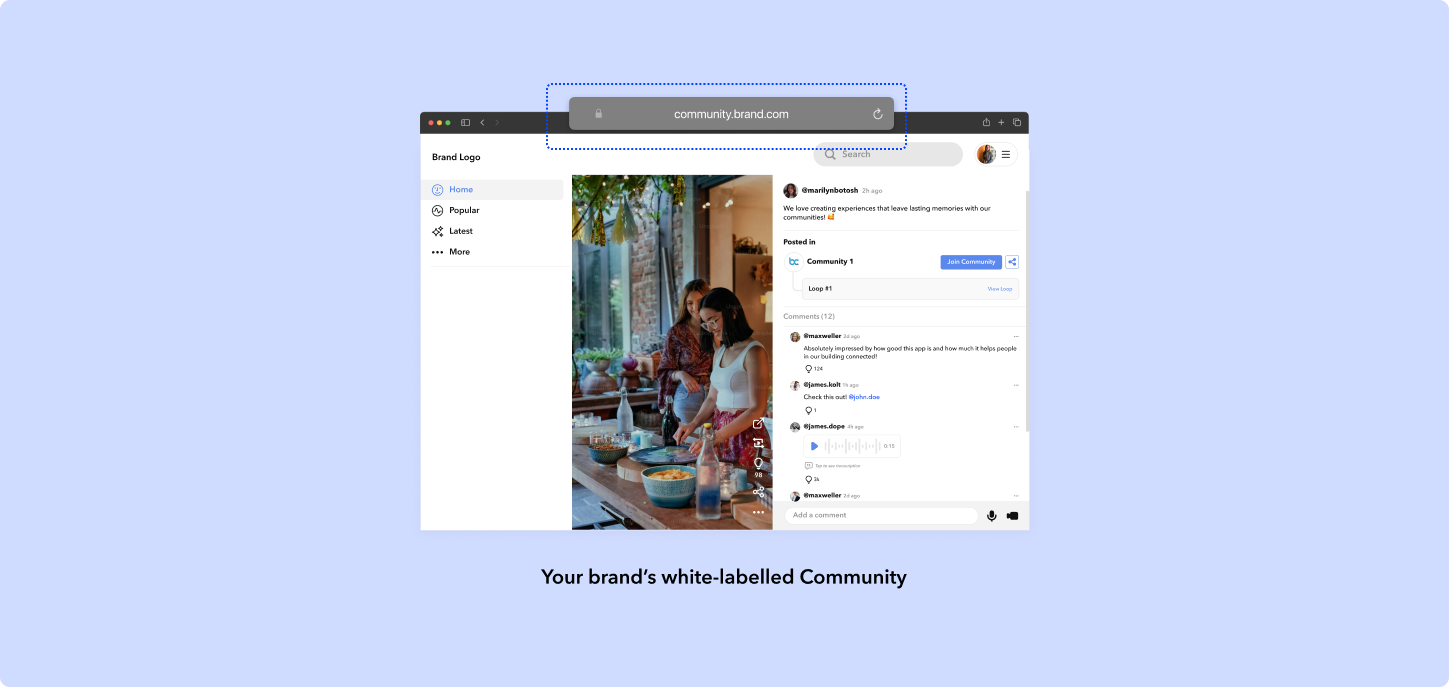
Steps for setting up Whitelabel
Use the subdomain you created while signing up on BCC. Prerequisite Configure your DNS server and CNAME settings : To set up a white label solution for your brand’s community, follow these steps to configure the DNS settings considering you want to map “brandname.begenuin.com” (your subdomain) to “community.brandname.com” (desired whitelabel URL) : 1. Login to Your DNS Provider: Access the control panel or dashboard of your DNS hosting provider. This could be services like GoDaddy, Namecheap, AWS Route 53, or any other DNS provider you are using, Follow the steps mentioned below of known DNS service providers.GoDaddy
GoDaddy
- Sign in to your GoDaddy Domain Control Center. (You might be prompted to log in).
- Select your domain to access the Domain Settings page.
- Scroll down to the Additional Settings and select Manage DNS.
- In the Records section, select Add or Edit to modify your CNAME record.
- Enter the details provided by Genuin for the CNAME record and save the changes.
Namecheap
Namecheap
- Log in to your Namecheap account.
- Select Domain List from the left sidebar and click on the Manage button next to your domain.
- Navigate to the Advanced DNS tab.
- Find the Host Records section and click on Add New Record.
- Choose CNAME Record from the drop-down menu and enter the details provided by Genuin.
- Click on the checkmark to save the record.
Bluehost
Bluehost
- Log into your Bluehost control panel.
- Click on Domains from the navigation menu at the top.
- Select the domain you wish to manage, and click on the DNS Zone Editor.
- Scroll down to the CNAME section and click on Add Record.
- Enter the record details as provided by Genuin and save.
HostGator
HostGator
- Log in to your HostGator cPanel.
- In the Domains section, click on Zone Editor.
- Click on Manage next to the domain you want to configure.
- Click on +CNAME Record to add a new record.
- Enter the necessary details for the CNAME record and click on Add Record.
Google Domains
Google Domains
- Sign in to Google Domains.
- Select your domain.
- Open the menu (if it’s not already open) by clicking on the domain name.
- Click on DNS in the left-hand menu.
- Scroll to the Custom resource records section and add your CNAME record accordingly.
AWS Route 53
AWS Route 53
- Sign in to the AWS Management Console and open the Route 53 console.
- In the navigation pane, choose Hosted zones
- Choose the name of the domain that you want to update
- Choose Create Record Set.
- Specify the CNAME settings provided by Genuin.
Cloudflare
Cloudflare
- Log in to your Cloudflare account and select your domain.
- Go to the DNS settings tab.
- Click on Add record.
- Choose CNAME from the type dropdown, enter the details as instructed by Genuin, and save the record.
- Name or Host: Enter the subdomain you want to map, for example, “community.”
- Value or Points To: Enter the domain you want to point to, in this case, “brandname.begenuin.com.”
- Enter the domain for whitelabeling.
- To activate, you must log in to your DNS provider’s interface and make changes (e.g. GoDaddy, Namecheap, Bluehost, Google Domains, Shopify, etc.)
- In your DNS provider’s environment, select the option to add a new CNAME record. You will typically need to provide the name or host. You can enter the subdomain you want to map, (e.g. “community”).
- Click on ‘Verify Connection’ and wait 48 hours for the configuration to populate and go live.
- Create your user and brand profiles.
- Add your brand elements.
- Create your community.
- Follow the same steps to set up whitelabel for your brand.
Why white label your brand communities to your own domain?
There are a few benefits to hosting your community under your domain. Whitelabeling enhances your brand’s online presence and positions you as an authority on your area of expertise. Hosting your community under your own domain can positively impact its visibility on search engines like Google. When all community content resides under your brand’s domain, it consolidates the authority and relevance of your website on search engines. As a result, your community content is more likely to rank higher in search engine results pages (SERPs), leading to increased organic traffic and better discoverability for your brand.Benefits of Whitelabel:
Let’s go over on how enabling and configuring these White Label Settings can benefit your brand or business.- Whitelabeling enhances your brand’s online presence and positions you as an authority on your area of expertise.
- To give your customers a seamless brand experience and optimize your search ability in Google, we recommend white labeling your Genuin community.
- Getting your brand’s SEO optimized : Hosting your community under your own domain can positively impact its visibility on search engines like Google. When all community content resides under your brand’s domain, it consolidates the authority and relevance of your website on search engines. As a result, your community content is more likely to rank higher in search engine results pages (SERPs), leading to increased organic traffic and better discoverability for your brand.
- When you implement whitelabeling, your brand’s communities will be hosted under your own domain (e.g. community.yourbrandname.com). If you choose not to whitelabel, Genuin will appear in the URL as the subdomain (e.g. begenuin.com/community/yourbrandname).
Notification Configuration
In this tab, you can integrate SMS, Email and Firebase.SMS (Short Message Service)
- Purpose: SMS notifications are sent directly to users’ mobile phones via text messages. They are useful for delivering urgent or time-sensitive information since SMS messages are typically read quickly.
- Advantages: High open rates, direct communication to mobile devices, suitable for urgent notifications.
- Purpose: Email notifications are widely used for sending updates, newsletters, or any non-urgent information to users’ email addresses. They provide a more detailed and versatile communication channel compared to SMS.
- Advantages: Ability to convey detailed information, supports multimedia content, easy to manage and archive.
Firebase (Firebase Cloud Messaging or FCM)
- Purpose: Firebase is a platform developed by Google that enables sending notifications and messages to users across various platforms, including Android, iOS, and web applications. Firebase Cloud Messaging (FCM) is particularly useful for sending push notifications to mobile devices.
- Advantages: Cross-platform compatibility, real-time delivery, supports rich notifications with images, buttons, etc.