-
Login to Brand Control Center
Begin by logging into your Brand Control Center. -
Navigate to Community Management
From the dashboard, go to:
Manage > Communities. -
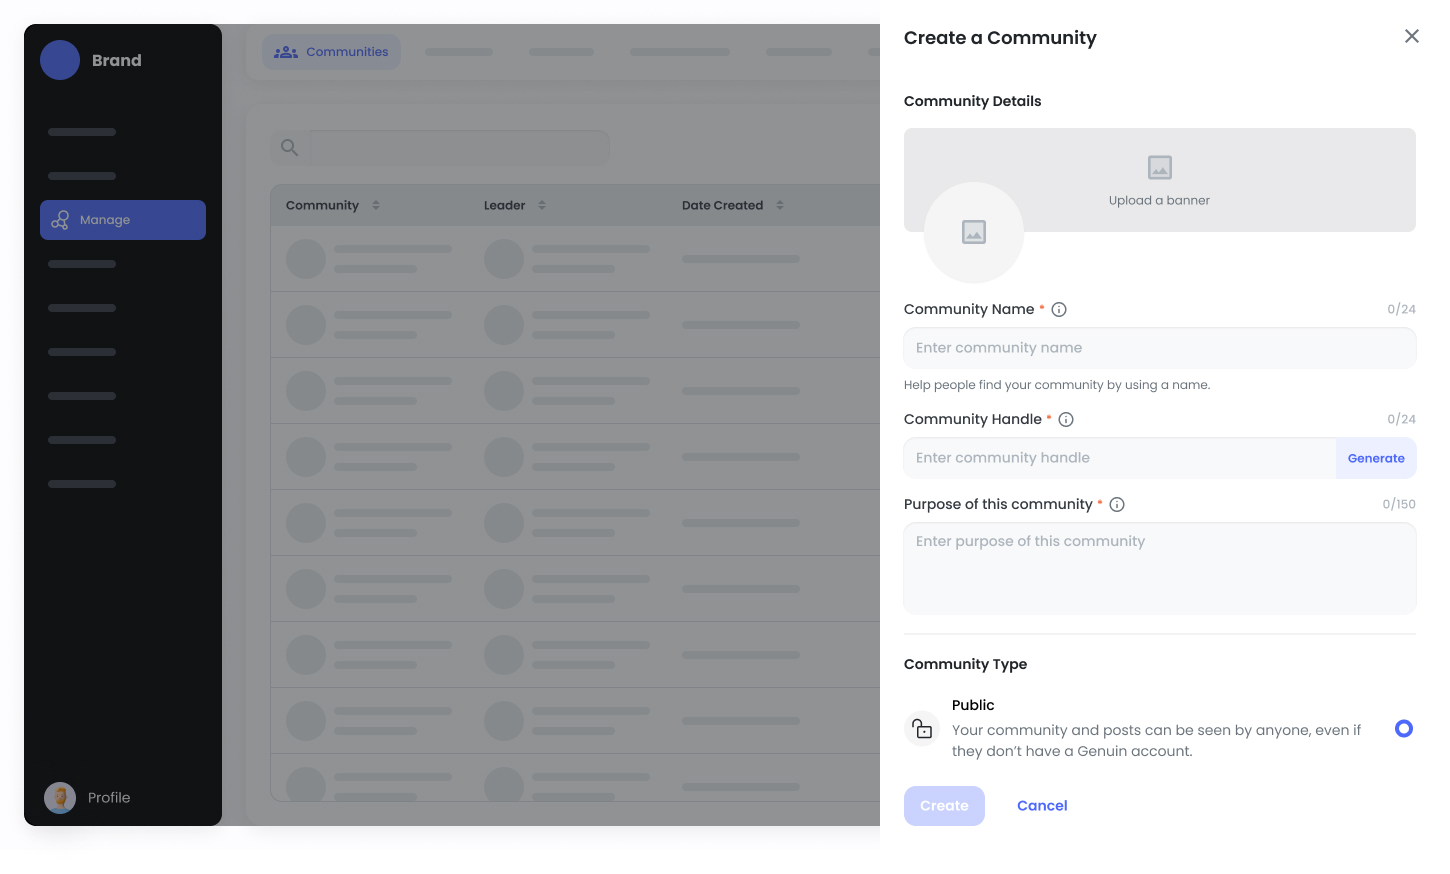
Create a New Community
Click on the “New Community” button to start setting up your community space.

- Fill in Community Details
You’ll need to provide key details such as:
- Community Image
- Banner
- Community Name
- Community Type
-
Settings for visibility, including who can see the Group.