OnSite
Embedding your brand’s community platform allows you to seamlessly integrate your community and content into your website, enhancing engagement and visibility. This guide will walk you through the main features and steps to get your embed set up, whether you’re an experienced user or just getting started.
Getting Started:
Step 1: Login to Brand Control Center
Start by logging into your Brand Control Center and navigating to the Grow > On Site section.
Step 2: Click on +New Embed
Begin by selecting the option to create a new embed.
Step 3: Name Your Embed
Enter a unique name for your embed. This will help you easily identify it later.
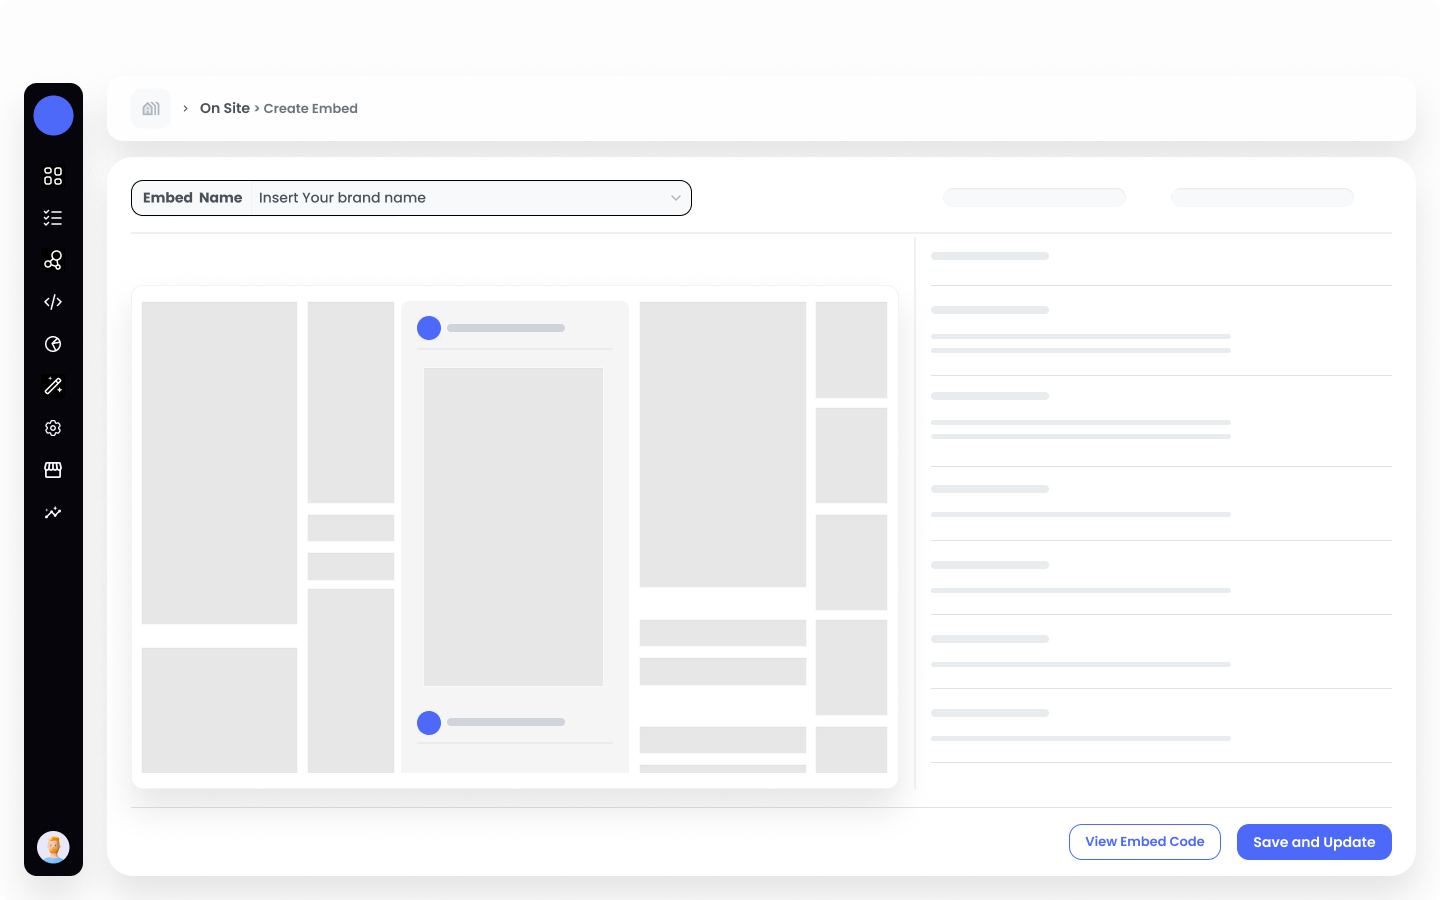
Step 4: Choose Your Embed Type
Select from three distinct types:
Brand Feed
Brand Feed
Select this type if you want to display the entire brand feed.
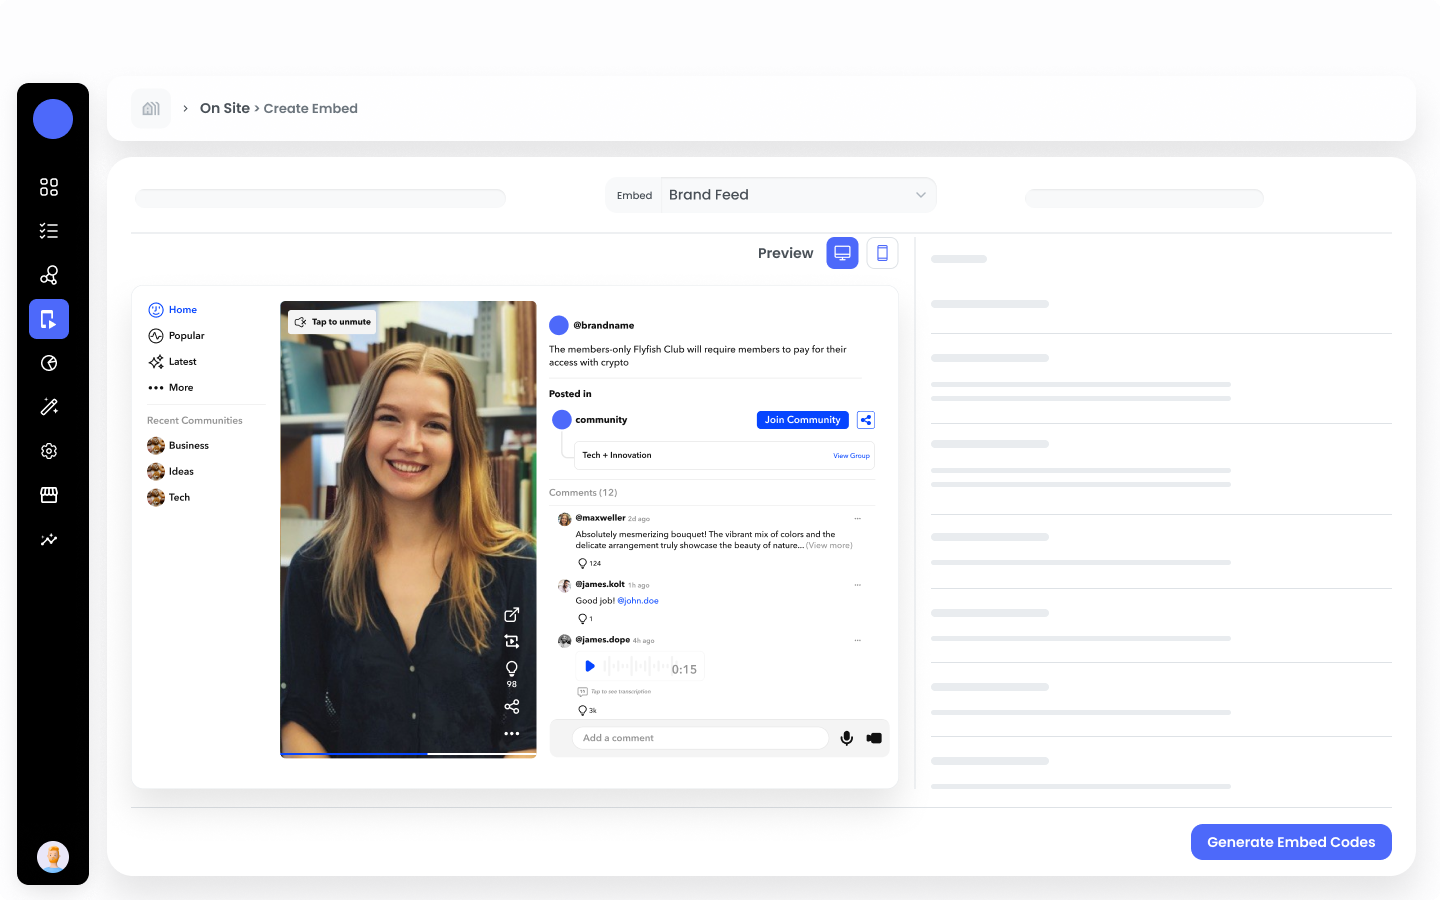
Community Feed
Community Feed
Select this type if you want to display just the community feed.
Group Feed
Group Feed
Select this type if you want to display just the group feed of particular community.
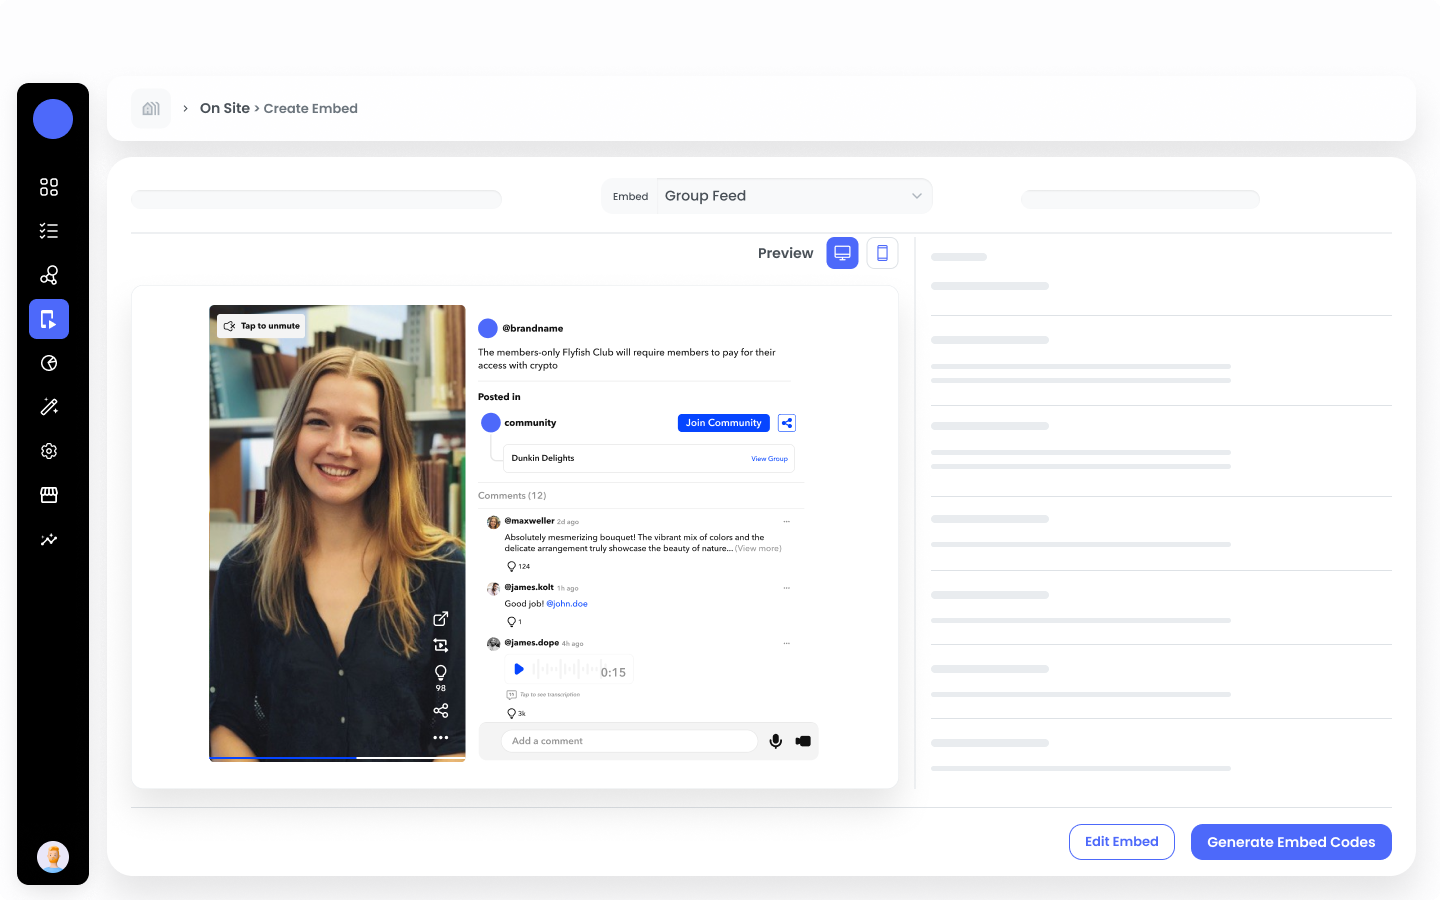
Step 5: Choose Your Embed Style
Select from three distinct styles:
Standard Wall
Standard Wall
Display your content in a traditional grid format.
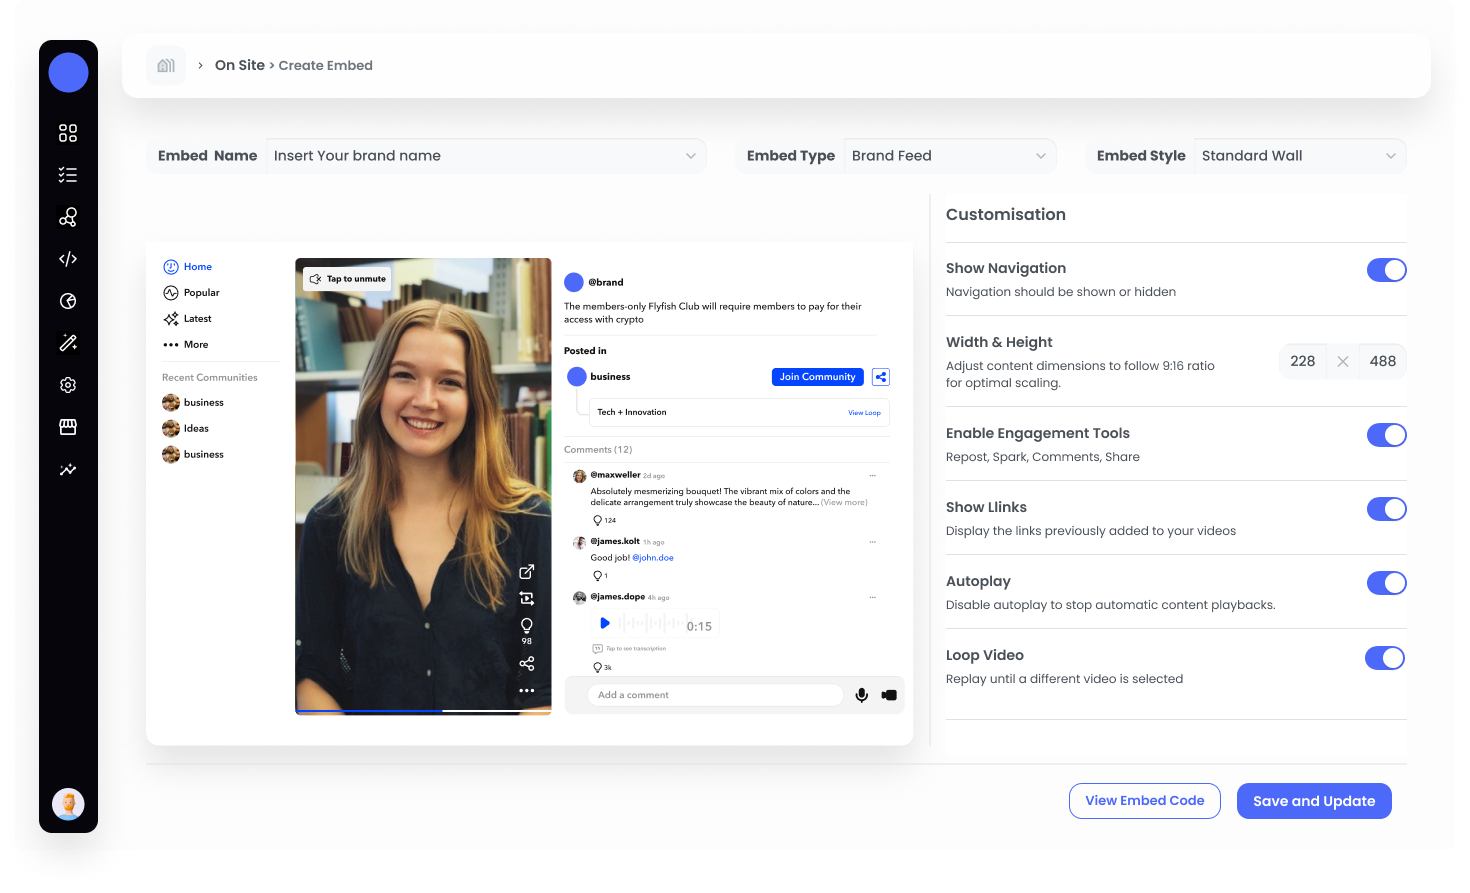
Settings
Embed Size: Specify the width and height for the embed to ensure it fits perfectly within your website’s layout.
Show Navigation: Choose whether to include navigation controls.
Enable Engagement Tools: Enable this to display the Repost, Spart, Comment, and Share.
Show Links: Enable this option if you want to make linkouts visible.
Group Video: Enable this feature to auto play the video.
Feed
Feed
Showcase your content in a continuous scroll, similar to social media feeds.
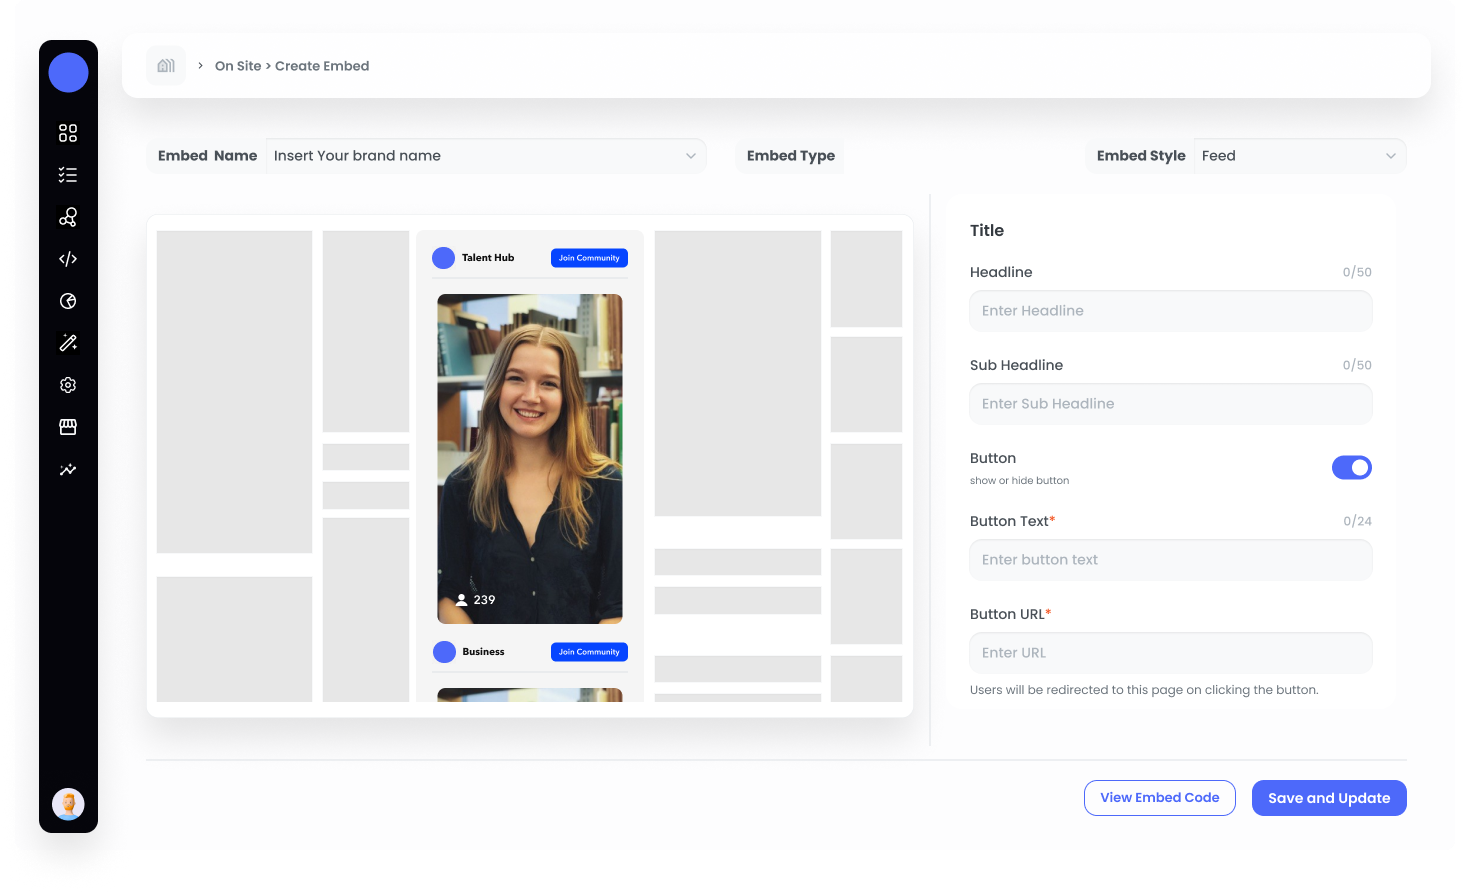
Settings
Headline: Insert the Headline you want to display on Embed
Sub-Headline: Insert the Sub-Headline you want to display on Embed
Button: Enable this option if you want to show the button and fill in the below details.
Button Text: Insert the button text you want to display
Button URL: Insert the URL where you want to redirect the user whenever the button is clicked
Embed Size: Specify the width and height for the embed to ensure it fits perfectly within your website’s layout.
Enable Floating View: Enable this option if you want to have the floating view on the page whenever the user closes the post.
Show Username: Enable this option if you want to show the user name of the video creator
Show View Count: Enable this option if you want to show the view count of the post
Enable Engagement Tools: Enable this to display the Repost, Spart, Comment, and Share
Show Social Interaction Data: Enable this option to display the count of Spark, Comments, and Share.
Show Links: Enable this option if you want to make linkouts visible.
Position: Select where you want to display the link. From Outside or Overlay
Autoplay Video: Enable this option to autoplay the video
Group Video: Enable this option to replay the video until any other video is played
Carousel
Carousel
Highlight featured content with a rotating display.
Settings
Headline: Insert the Headline you want to display on Embed
Sub-Headline: Insert the Sub-Headline you want to display on Embed
Button: Enable this option if you want to show the button and fill in the below details.
Button Text: Insert the button text you want to display
Button URL: Insert the URL where you want to redirect the user whenever the button is clicked
Embed Size: Specify the width and height for the embed to ensure it fits perfectly within your website’s layout.
Enable Floating View: Enable this option if you want to have the floating view on the page whenever the user closes the post.
Show Username: Enable this option if you want to show the user name of the video creator
Show View Count: Enable this option if you want to show the view count of the post
Enable Engagement Tools: Enable this to display the Repost, Spart, Comment, and Share
Show Social Interaction Data: Enable this option to display the count of Spark, Comments, and Share.
Show Links: Enable this option if you want to make linkouts visible.
Position: Select where you want to display the link. From Outside or Overlay
Autoplay Video: Enable this option to autoplay the video
Group Video: Enable this option to replay the video until any other video is played
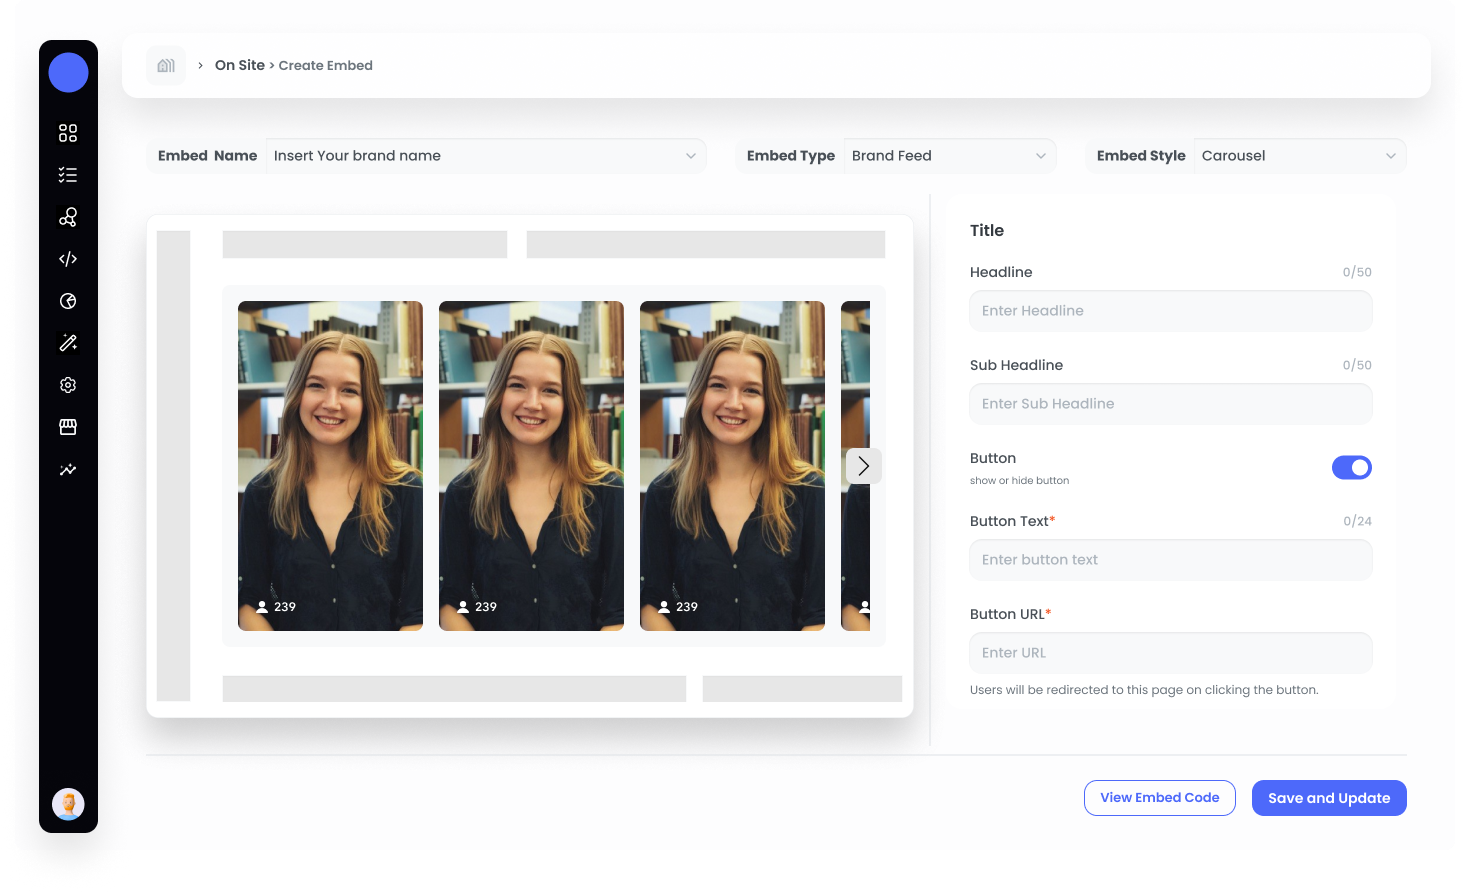
Step 6: Generate Embed Code
After configuring all settings, click on “View Embed Code.” A slider will open from the right, providing you with the code.
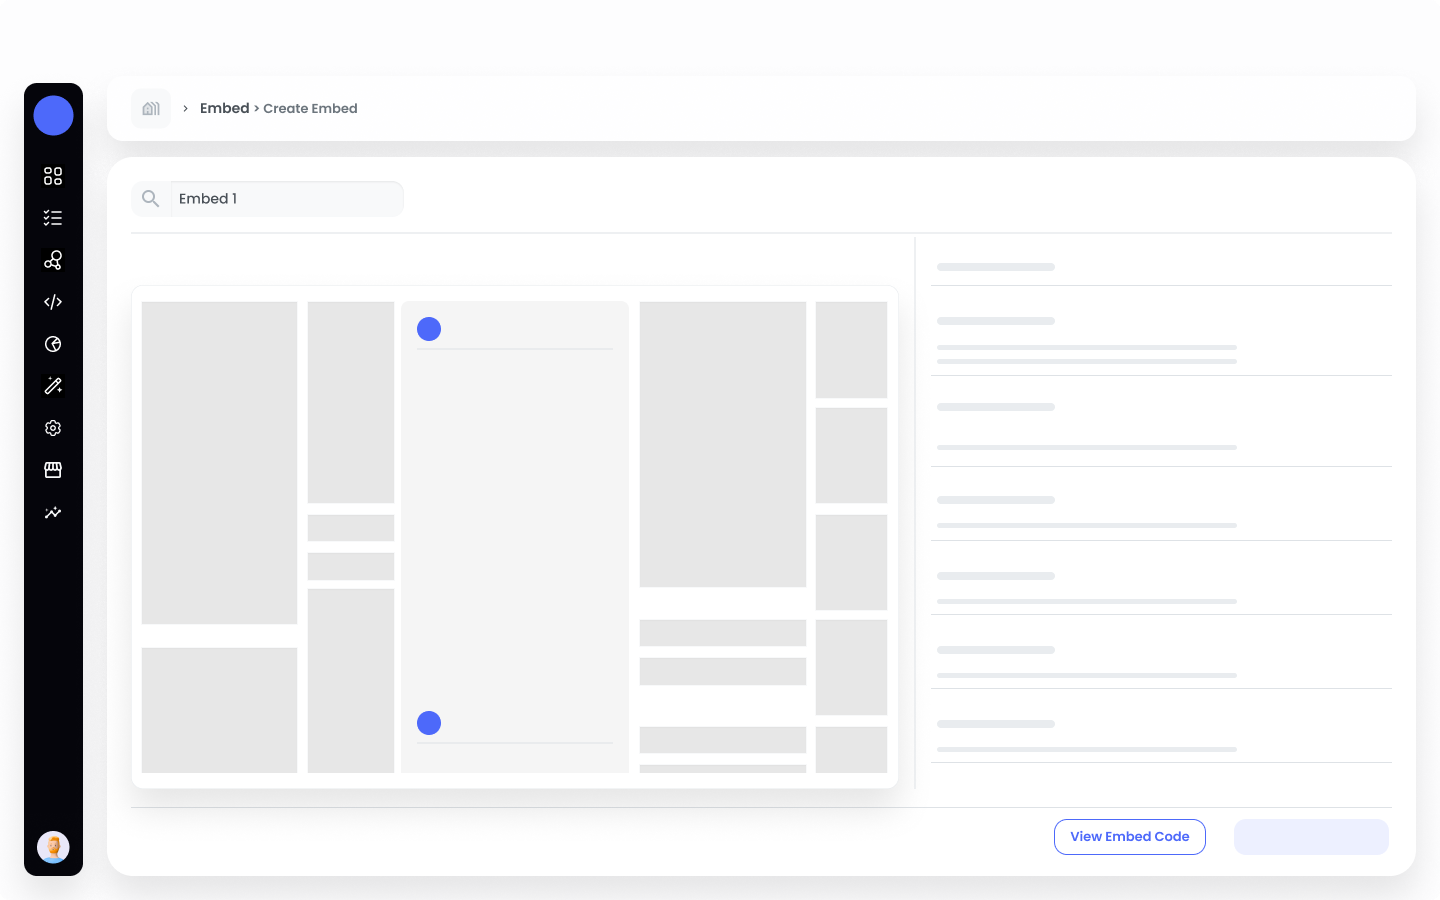
Step 7: Integrate Into Your Website
Copy the generated code and paste it into your website where you want the content to appear.
Managing Your Embeds
Once you create an embed, it will be listed in the Embed List. This section provides a central location where you can easily access and manage all of your existing embeds.
Within the Embed List, you can monitor key performance metrics to gain insights into how your content is performing. These metrics include:
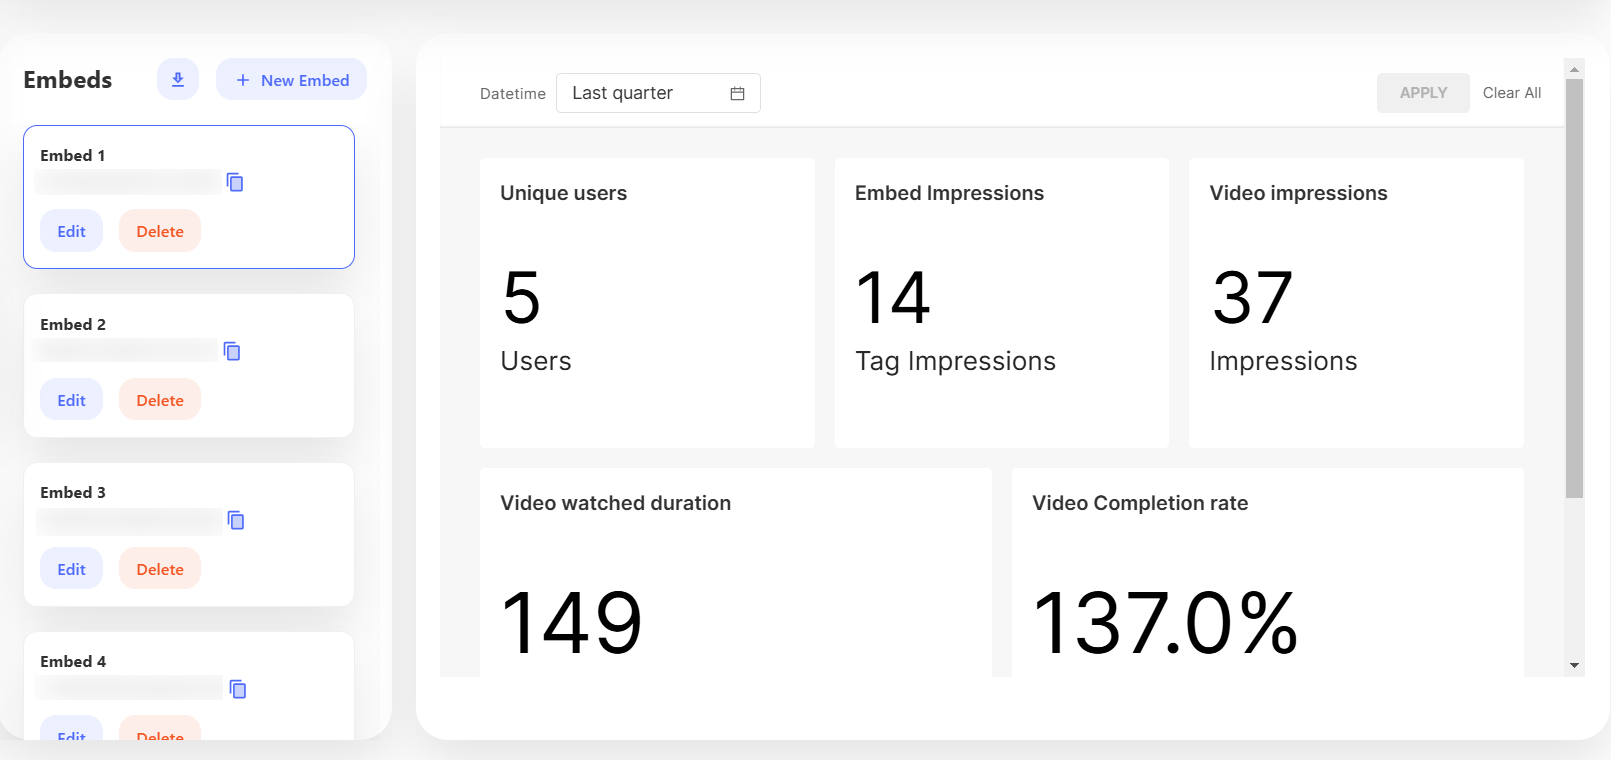
-
Video Impressions
-
Unique Users
-
Embed Impressions
-
Video Watched Duration
-
Video Completion Rate
You can also use filtering options to view specific data segments, allowing you to focus on particular aspects of your embed’s performance.
Edit Embed
To make changes to an embed, click the Edit button. This allows you to update settings, customize styles, or adjust content as needed.
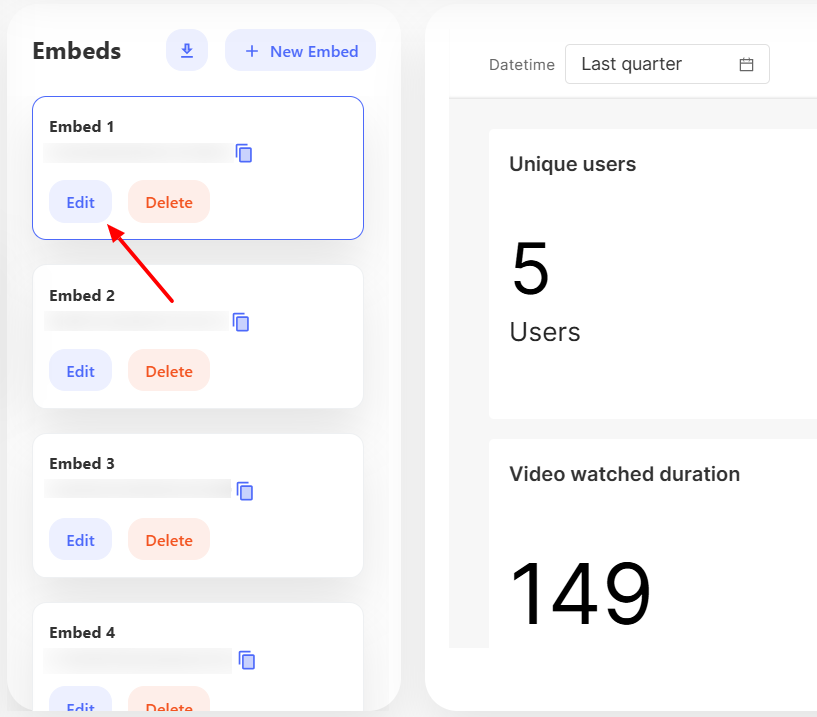
Delete Embed
If you need to remove an embed, simply click the Delete button. This will permanently remove the embed from both your list and your website.
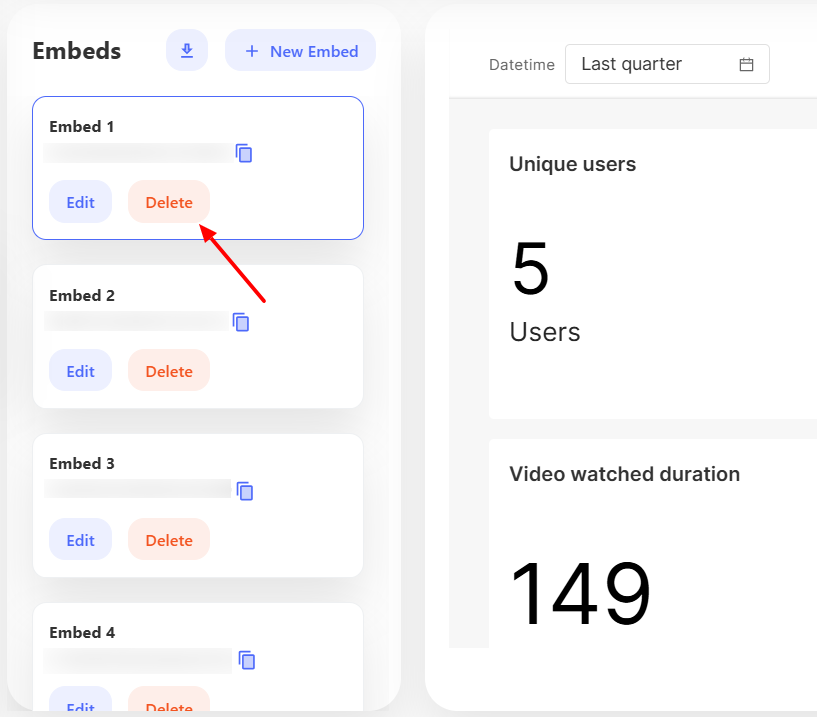
Front Demonstration
Mobile View
Carousel
Carousel style displays videos in a horizontal, swipeable layout for easy browsing. You can easily embed such videos in your Android or iOS platforms.